The term resolution refers to the number of pixels (or dots per inch – DPI) per inch of the image. So, a higher resolution means improved quality.
Take High-Resolution screenshots in Windows 11/10
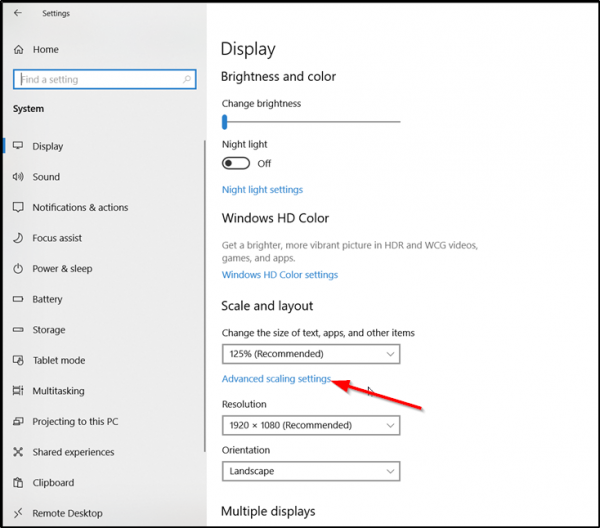
In Windows 10, go to ‘Settings’, choose ‘System’ and then select ‘Display’. Next, under ‘Screen and Layout’ section, click on ‘Advanced scaling settings’.
Now, turn the slider below ‘Let Windows try to fix apps, so they are not blurry’ from ‘off’ to ‘on’. Doing so will make apps on your main display look better.
Alternatively, you can enter a custom scaling size between 100-500. Following this, displays will be set to the custom scaling size you enter. When done, hit the ‘Apply’ button to allow the changes to take effect. In Windows 11, you will see the settings here:
Open Settings > System > Display > Custom scaling. The above option has one shortfall – it can cause some texts, apps, and items to be unreadable if the display doesn’t support that size. Also, it might be hard to go back to the original settings.
Using GIMP
If you use GIMP, a free photo editing software, you can improve the quality of screenshots. Read: How to Check and Change Image DPI in Windows. Launch GIMP. If GIMP is not installed on your PC, download it from gimp.org. Next, select ‘File’ and choose ‘Open’. Once done, highlight the screenshot of whose quality you would like to improve. After that, select ‘Open’, choose the “Image” menu and check the box marked against ‘Scale Image’ option.
Now, find the resolution fields and change, When done, choose ‘Scale’ > ‘File’ and ‘Save’. Save the changes when done. High or enhanced resolution can make a significant difference in the image quality of a screenshot. Hope you like this tip! PS: Gimphoto and GIMPshop come with GIMP reloaded with some useful plugins and resources. You may use one of these too.