Before we jump into the subject matter proper, below is the prerequisite check;
Plan on what you might want to do with role data – you can either save or delete it.You may want to plan and migrate role data to another server.Domain users must be informed about the potential interruption of services, as users might be affected during the process and the server may need to be rebooted.You will have to schedule downtime for services that may be affected.
Once you have ticked all the boxes, you can now proceed to remove roles and features in the Windows server.
Remove Roles and Features in Windows Server
To remove Roles and Features in Windows Server, do the following:
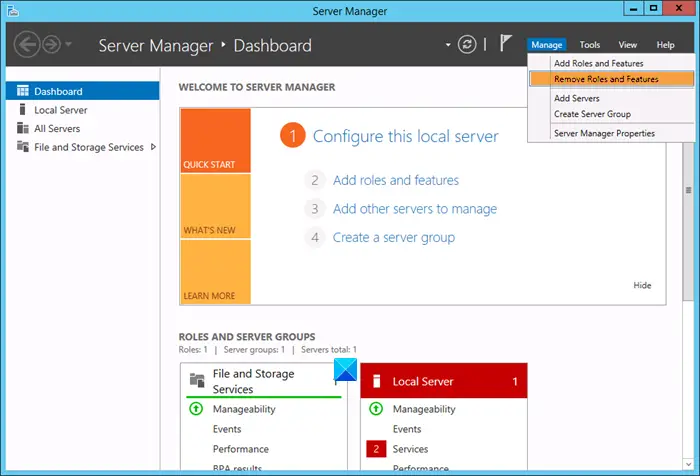
Open Server Manager.Click Manage > Remove Roles and Features to launch the Remove Roles and Features Wizard.Review the proposed instructions.When done, click on the Next button under Before You Begin section.Next, in the Select destination server page, select the server from which you want to remove roles and features.Next, in the Remove server roles page, uncheck the option for the role you want to remove.Click Next.Next, in the Remove features page, uncheck the feature you want to remove.Click Next.In the Confirm removal selections page, select the Restart the destination server automatically if required option.
The server will be automatically restarted without additional notifications when this option is selected, as most of the features or roles may require rebooting the server.
Click Yes on the prompt that appears.Now, click the Remove button.
Windows Server will now remove the feature/role you selected – and the server might restart when the removal process is completed. You’ll get confirmation on the Results page. That’s it! Hope you find this our guide on how to remove Roles and Features in Windows Server helpful. Related post: Windows Admin Center: Manage servers, clusters, infrastructure.