Change Print Screen Screenshots folder location
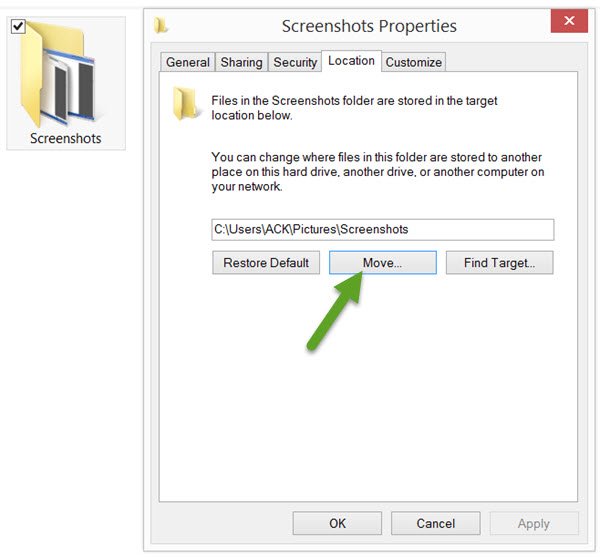
To change the folder where the Windows operating system saves its screenshots, you will have to do the following. Navigate to the following location, where you will see a Screenshots folder: If you do not see the Screenshots folder, you need to hit Win+PrtScr to take a screenshot first. This screenshot will then be saved in the Screenshots folder, which will get created by Windows to save your screenshots. Right-click on the Screenshots folder and select Properties. Under the Location tab, you will see the target or the folder path where screenshots are saved by default. You can change where files and folders are saved to another location on your computer – including the Desktop, another drive, another computer on your network. To do this, click on the Move button, and navigate to the folder location which you want to save the screenshots, via the Select a Destination box which opens up. Select the folder and click Apply. Once you have done this, your captured screenshots will be saved to this new location.
To restore the default folder path, you have to simply click on the Restore Default button and click Apply. This post may interest you if Windows not saving captured Screenshots in the Pictures folder. If you are looking to change default folder locations for some other Windows folders, maybe some of these posts will be of help to you:

