Before you change your DNS settings in Windows 11/10/8/7, to use Google DNS or any other, be sure to write down the current server addresses or settings on a piece of paper. It is very important that you keep these numbers for backup purposes, in case you need to revert to them at any time.
Change DNS settings in Windows 11/10
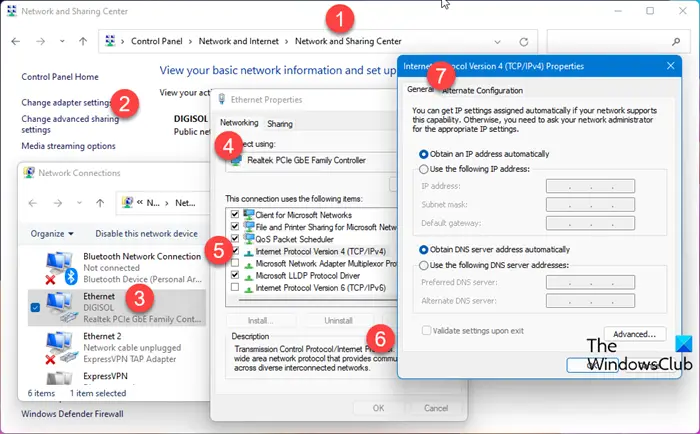
To change the DNS settings in Windows 11/10, do the following: For Google Public DNS, select Use the following DNS server addresses. If there are any IP addresses listed in the Preferred DNS server or Alternate DNS server, write them down for future reference. Replace those addresses with the IP addresses of the Google DNS servers:
Preferred DNS server: 8.8.8.8Alternate DNS server: 8.8.4.4
Restart the connection you selected above. Repeat the procedure for additional network connections you want to change.
DNS Changer software
Alternatively, if you want to change your DNS settings with one click, DNS Jumper is something you may want to check out. It’s a portable freeware app that lets you choose from various options.
QuickSetDNS is another tool that will let you change DNS Server in Windows 11/10/8/7 quickly.Public DNS Server Tool is a free DNS changerNetSetMan is a feature-rich Network Settings Manager for Windows.
Using the correct DNS provider may help you increase your browsing speed.
Read about: Comodo Secure DNS | OpenDNS | Yandex Secure DNS | Cloudflare DNS | Angel DNS. These resources may also interest you: