Change Audio & Video settings in Skype for Business
The method will help you set up and use a headset, the built-in microphone and speakers on your computer, or another device for Skype for Business audio. To use the audio features of Skype for Business, your computer must have a working microphone and speaker. If there is no built-in microphone, then you must connect an external microphone or headset to your computer. Before you start a call, its good to make sure your speakers, camera and headsets are set the way you want it.
1] Select Audio Device Settings
Begin by selecting the ‘Primary Device’ button to open the device’s menu.
In the window that opens, select ‘Audio Device Settings’.
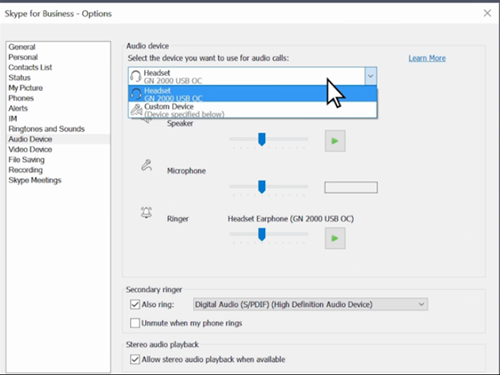
2] Adjust speed of the speaker
Choose the device you want to use for your meetings. If you don’t see your device listed, check if it’s connected directly to your computer. You can try the Sound and Audio troubleshooter to fix audio problems automatically. For this, click the Start button, type Troubleshoot, and then choose ‘Troubleshoot’ from the list. Related read: Skype Audio or Microphone not working.
Click ‘Playing Audio’ > ‘Run the troubleshooter’.
If the device is visible under the list, press the green ‘Play’ button to test the speaker. Adjust the speed of the speaker. You can use the slider to adjust the volume. If you cannot hear anything, make sure the speakers are ‘On’ and not muted. Then, start speaking to test your Microphone.
3] Check Camera Settings
Select ‘Video device’ from Skype for Business Options. Pick your camera from the list. Adjust the settings, if required by hitting ‘Camera Settings’ button. When you are done, click ‘Ok’. Now, try making a video call. You should be good to go! By changing your audio and video preferences in Skype for Business, you and your contacts get the best meeting experiences.