Registry Editor is a very handy tool, which comes with the system itself. You can open Registry Editor and make different changes as per your requirements. From changing default image editor to enabling the Dark Mode, you can do every type of customization using Registry Editor. In this post, we will show you how you can use Registry Editor to add Registry Editor to the Control Panel. However, you need to create a .reg file with Notepad or any other text editor.
How to add Registry Editor to Control Panel
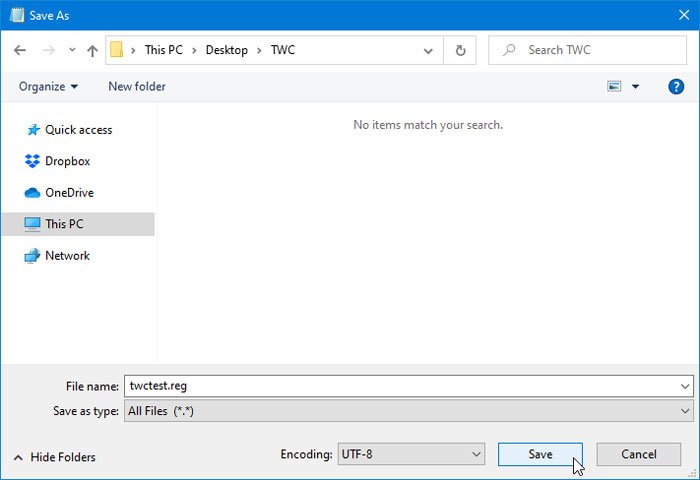
To add Registry Editor to Control Panel, follow these steps- Let’s delve into the steps in detail. At first, open the Notepad on your computer. For that, search for “notepad” in the Taskbar search box and open the corresponding result. After that, paste the following texts in the Notepad window- After that, click the File option from the menu and select Save As button. Now, you need to choose a location where you want to save the file, enter a name with .reg extension and choose All Files from the Save as type drop-down list.
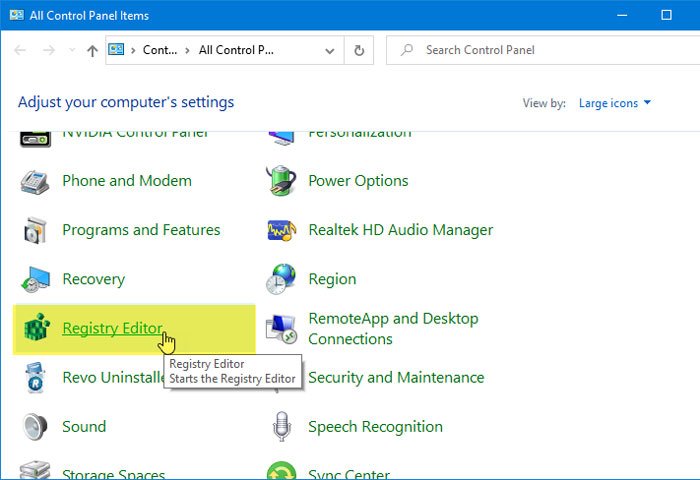
After that, click the Save button. Now, you need to open the file to add values to the Registry Editor. For that, double-click on the newly created .reg file, click the Yes button in the UAC prompt, and the same button in the next window to confirm the addition. Now, open Control Panel to check if the Registry Editor is added or not. If everything goes correctly, you can see the Registry Editor in the Control Panel. You need to set the View by as Large icons to get the option in your Control Panel. That’s all!