When you try to launch the Steam client on Windows 11/10, you might receive one of the following error messages: The problem is related to the Steam service which is vital for the Steam application to operate properly. OR In order to run Steam properly on this version of Windows, the Steam service component must be installed. The service installation process requires administrator privileges. The major cause for the Steam Service error is that Steam simply doesn’t have enough permissions either to perform a certain action or to access a certain file. Another reason for the error may be caused by Steam Service simply not running when it should and also the service might be broken and you will need to repair it.
Fix Steam Service component error
If you’re faced with the Steam Service installation error, you can try our recommended solutions below in no particular order and see if that helps to resolve the issue. Let’s take a look at the description of the process involved in relation to each of the listed solutions.
1] Run Steam as an administrator
Recent Windows or Steam updates may have changed something regarding the permissions for the Steam executable and it may not be able to access all folders it was able to access before the updates. Therefore, you can try to run the Steam program as an administrator and see if that helps. Here’s how:
Locate the Steam executable on your computer. If it’s located on your desktop as a shortcut, simply right-click the shortcut and choose the Properties option from the context menu. If not, you will need to locate its installation folder on your computer. If you have changed the default folder during the installation, make sure you navigate to it.Navigate to the Compatibility tab inside the Properties window.Under the Settings section check the box next to the Run this program as an administrator option.Click Apply > OK for the changes to take effect.
Check to see if the issue persists. If so, try the next solution.
2] Ensure the Steam Service Starts up automatically
The Steam Service needs to be running in order for Steam to run smoothly. This service should start up each time Steam is launched but sometimes that is simply not the case. In order to resolve that, you should make sure this service starts up automatically on your computer. Here’s how:
Press Windows key + R.In the Run dialog box type services.msc and hit Enter.Scroll and locate the Steam Client Service in the services list and right-click on it and select Properties from the context menu.
If the service is started (you can check that just next to the Service status message), you should stop it by clicking the Stop button in the middle of the window. If it has already been stopped, leave it as it is (for now).
Make sure that the option under the Startup type menu in the Steam Client Service’s properties is set to Automatic and confirm any prompts which may appear when you set the startup type.Now, click on the Start button under the Service status section.
You may receive the following error message when you click on Start: In which case, do the following to resolve the error:
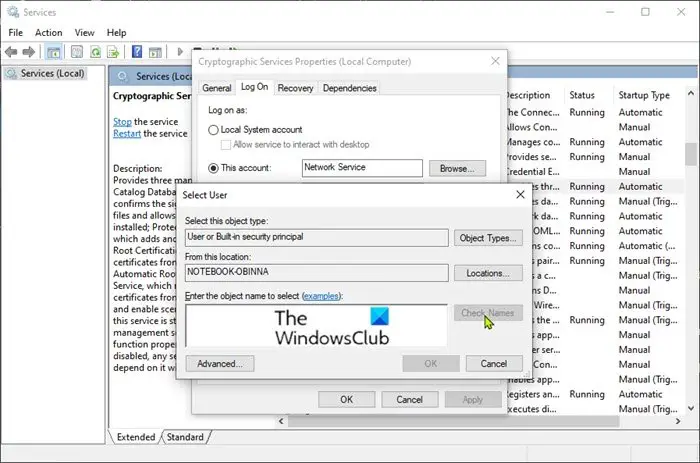
Press Windows key + R.In the Run dialog box type services.msc and hit Enter.Scroll and locate the Cryptographic Services in the services list and right-click on it and select Properties from the context menu.Navigate to the Log On tab and click on the Browse… button.Under the Enter the object name to select field, type in your account’s name, then click on Check Names and wait for the name to become recognized.Click OK when you are finished and type in the password in the Password box when you are prompted with it if you have setup a password.Click the Start button again. The service should now start without the error 1079.
You can now open Steam by double-clicking its icon and see if the Steam Service error still appears. If so continue with the next solution.
3] Repair the Steam client service
The Steam client service can sometimes break which can trigger the Steam Service installation error. This solution requires you to repair the Steam client service by running a simple command in Command Prompt. Here’s how: First, you need to find out the root folder of your Steam installation which will be necessary to run the command. You can find the full path by right-clicking its shortcut on the Desktop and choosing the Open file location option from the context menu. Now press ALT + D key combo and then press Ctrl + C key combination to copy the file path to the Clipboard. The default path should be: Now, press Windows key + R. In the Run dialog box type cmd and then press CTRL + SHIFT + ENTER to launch Command Prompt in admin mode. In the command prompt window copy and paste the command below and hit Enter. After the command executes, launch the Steam client and see if the issue is resolved. Hope this helps!