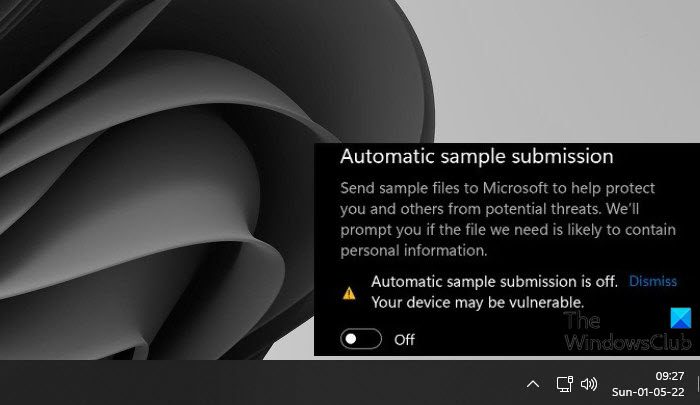
In this article, we are going to resolve this issue and will see what you have to do if Automatic sample submission is off in Windows Defender.
Why Automatic Sample Submission is off?
When you set up your Operating System, the Automatic Sample Submission gets automatically enabled. But sometimes, after an update or after installing an app it gets disabled. Sometimes, even the user manually disables it and then forgets to turn it back on. However, in some cases, when trying to enable the Automatic Sample Submission, the toggle turns it on but then disables it instantly or after some time. That’s when we have to edit the policies and/or the registries to make it work.
Automatic sample submission is off in Microsoft Defender
If the Automatic Sample Submission is off in Windows Defender, you should first update your system. If updating is to no avail, try the following solutions. Let us talk about them in detail.
1] Enable Automatic Sample Submission from Windows Security
Your Automatic Sample Submission is disabled, let us first try to enable it in a regular way. What you have to do is search out the “Windows Security” app from the Start Menu. Now, go to Virus & threat protection > Manage settings. Then, enable Automatic Sample Submission by its toggle. This was an easy method, but for most users, the feature automatically gets disabled even after enabling it, for them, we have two other methods.
2] Use Group Policy Editor
Maybe there is something wrong with a policy as a result of which the samples aren’t submitted. Try the following steps to configure a policy and see if it works.
Press Win + R to open the Run box, type gpedit.msc, and click OK.Navigate to Computer Configuration > Administrative Templates > Windows Components > Microsoft Defender Antivirus > MAPS.In the right section, look for “Send sample files when further analysis is needed”.Double-click on it and select Enabled.Click Apply > Ok.Save your changes and reboot your computer.
Now, open your system and see if the issue persists.
3] Use Registry Editor
If you don’t have Group Policy Editor on your computer, you can make the adjustments in the registries. We are going to configure a few of them to fix the issue. But first of all open Registry Editor by searching it out from the Start Menu. Now, navigate to the following location. Once you have reached the location, right-click on the Windows Defender folder and select New > Key. Name the newly created key “SpyNet”. Click on SpyNet to enter the folder. Now, right-click on the empty space, click New > DWORD (32-bit) Value, and name it “DisableBlockAtFirstSeen“. Double-click on DisableBlockAtFirstSeen, set Base to Hexadecimal, and Value Data to 0. Also, create keys named “SpynetReporting” and “SubmitSamplesConsent” and set their Value data to 1. Restart your computer and check if the issue persists.
4] Restore your system using System Restore Point
If you have created a restore point then this might be a great time to unleash it. This will roll back your system to a point when Automatic Sample Submission was working just fine. If you don’t have a restore point, skip this solution. Search “Restore Point” from Start, and click on System Restore. Now, select a restore point and click Next. Finally, follow the on-screen instructions to carry out the process. Once you do that, a lot of your settings may also be dialed back a little, but you can always adjust them. But notably, your issue will be resolved. Hopefully, now you can enable Automatic Sample Submission at any time.
What is Automatic Sample Submission?
Microsoft’s Windows Defender is a multilayer antivirus and tries to examine and test every single suspicious file thrown its way. If it thinks that a file is malicious, it will notify the users. But if it can’t determine whether the file is a virus or not, the sample will be sent to the Cloud-based protection, which will use its metadata for proper identification. In case, the Cloud-based protection also fails, a simple of that file is set to Microsoft using Automatic Sample Submission for further inspection. That’s why it is important to keep that feature on all the time. That’s it Also Read: Enable or Disable Core Isolation and Memory Integrity in Windows 11/10.

